
Start by selecting the menu you want to edit as shown below:
Upon selecting a menu, this page will populate with that menu's menu items. If this menu has no items, then only the Add New Menu Item row will exist. To add a new item, first choose one of the following: At the beginning of the list, At the end of the list, or After SelectedPage. Then click Add New Menu Item.
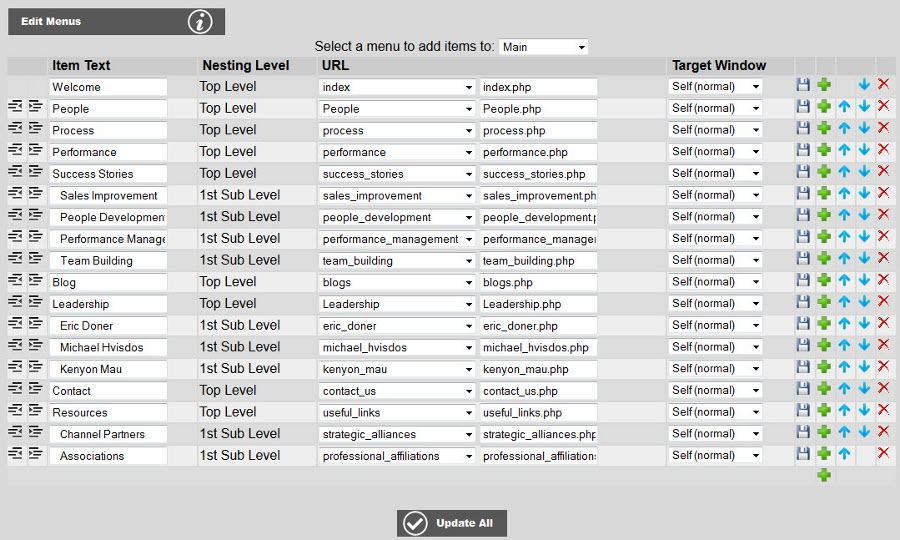
Note: Changes will not be recorded unless you select "Update".
To link your menu item to another page, i.e. an events description page, enter
the page name under link with a php file extension, i.e. "events.php",
or simply select an existing page from the list. You may also enter a URL to another site if you desire, i.e. http://someothersite.com.
You may also specify the nesting level for each menu item. By default
an item will be at the top
level. You may choose to make a menu item a sub menu of the top level by selecting 1st Sub Level.
To do this, click on the intent buttons to the left of the item: ![]() . The left button will outdent your item when selected, the right button will
indent your item when selected. The level column title will change with your
indent or outdent of the item.
. The left button will outdent your item when selected, the right button will
indent your item when selected. The level column title will change with your
indent or outdent of the item.
To make a menu item the sub level of an item set as 1st
Sub Level choose 2nd Sub Level, and so on. Note: It is important
that you do not skip nesting levels. For instance, if you have an item at the
top level, you may only choose Top Level or
1st Sub Level for the next item. You may not choose 3rd Sub Level if the above menu item is at the top level or the 1st sub level.

By default, the target window will be Self (normal) which will cause the page to open in the current browser window. If you would
like the selected page to appear in a new browser window (or a new tab in IE7
or Firefox 2.0.0.7 or later), then select New Window as the target. You may also
specify a named location if you have added frames to your pages by selecting Named Frame typing in the name reference of the frame in the target edit box.
You may also specify a specific target on the page (not to be confused with the window target mentioned above) by entering #targetname at
the end of the link, i.e. "about_us.php#mission_statement".
After entering the target you will have to add an anchor on the page with the area that you want to target. The source code for an anchor will look like:
<a name="targetname"></a>
Rearrange your menu order by moving items around inside your menu, using the
placement buttons on the right end of that item's row: ![]()
The buttons translate as follows:
![]() = SAVE
= SAVE
![]() = INSERT
= INSERT
![]() = SWAP WITH ROW ABOVE
= SWAP WITH ROW ABOVE
![]() = SWAP WITH ROW BELOW
= SWAP WITH ROW BELOW
![]() = DELETE
= DELETE
To insert a row below the bottom row, select the "insert" button on the bottom line of the table:
![]()
Starting in version 6.2.0 you can add mega menus to your website. You can assign/re-assign a mega menu to a menu item in the menu items editor. The assignment dropdowns are shown below:
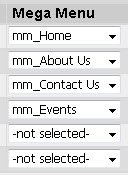
Simply select a mega menu from the list in the row of the menu item you want to add the mega menu to, then click save. Note: Initially, these lists will not contain any mega menus. You must first use the mega menu management console to create one or more mega menus before they will show up in the list. To get to the mega menu management console, click the Manage Mega Menus button as shown:
![]()
To lear more about creating/editing/managing mega menus see Managing Mega Menus.